Learning to do a drop ceiling installation can be a rewarding experience and a money-saving skill. Get ready for your install with safety reminders, helpful hints, a list of tools needed, and detailed instructions.
Read complete installation instructions before beginning your installation. Instructions can be found at the end of this overview.
Let your ceiling panels adjust to the environment in the room of installation.
Unpack all panels at least 24 hours prior to installation. Panels may be stored in areas with a temperature between 60°and 80°F. Also, be sure to check that the relative humidity is below 70%. You may consider purchasing a dehumidifier with a humidity reader for this.
Know your ceiling and grid terms.
Mark hidden joists.
For joists that are hidden behind drywall, you’ll want to use this tip to mark where they are:
Knock on the drywall. You should hear a solid thud when you tap on a joist. You can also use a stud finder to help with this task.
Don’t forget to determine the direction of the joists as well. Helpful hint: joists are usually 16” apart on center.
Plan the location of each ceiling panel for an even layout.
If your new drop ceiling installation will have border panels, make sure that the opposite sides of the room have the same border width. Always cut panels face up with a sharp utility knife.
Place all ceiling and grid materials in one location. Be sure to check out the drop ceiling calculator tool to help with the layout and a list of the materials needed for your project.
You will need:
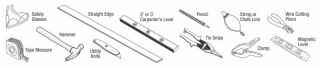
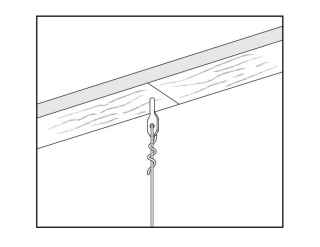
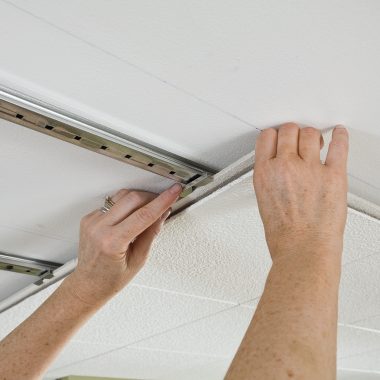
Install Fasteners and Hanger Wire
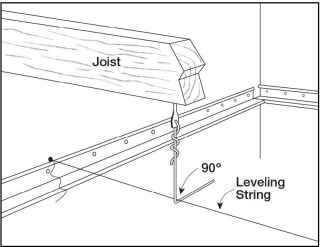
Pre-bend Hanger Wire
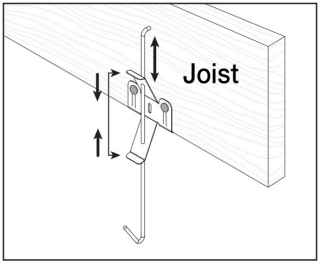
OR: Attach QUICKHANG brackets to joists and insert hooks
4. Hang Main Beams – Cut the first main beam to make sure there is a cross tee hole where your pre-determined first border cross tee is to be located. The first cross-tee hole in each row of main beams must line up. Always put the cut end of the main beam on the wall molding. To hang, simply slide each hanger wire or QUICKHANG hook through one of the small round holes in the main beam. Repeat these steps for the second main beam.
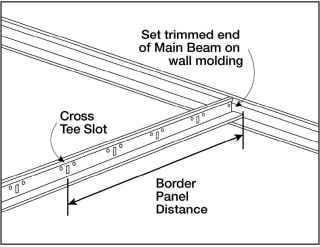
Cross-tee slot at border panel distance
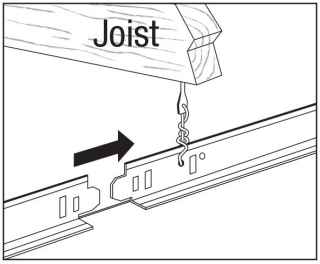
Main beams hung with hanger wire
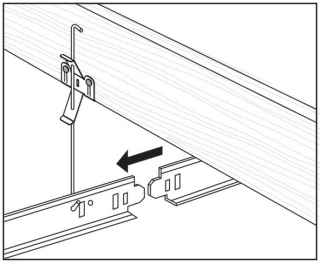
Main beams hung with QUICKHANG hooks and brackets
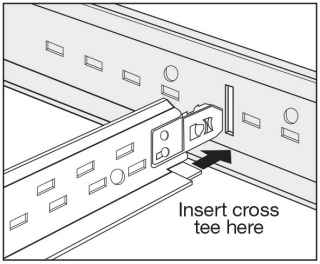
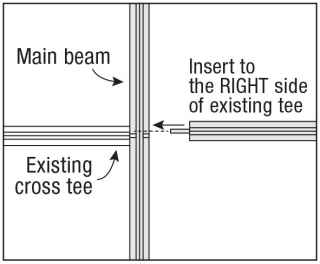
5. Install the Cross Tees – You will need to measure and cut the border tees to the border panel size. Place cut end of tees on wall molding and connect the uncut end to main beam. Now insert the first two uncut cross tees in line with the border cross tees. When connecting two cross tees in the same rectangular hole in a main beam, insert the second tee into the slot by passing on the right side of the already installed tee.
6. Squaring the Grid – To achieve the best end results, it’s important to make sure your grid is square at this point. To check that your grid is square, measure across the diagonals of the 2’x4’ opening. The measurements will be the same if the grid is square. If the measurements are not the same, trim one of the main beams further until the diagonals are equal.
7. Finish Grid – Repeat steps #4 and #5 for all other main beams and cross-tees. Click additional main beams and cross tees together as needed. When connecting grid elements together, an audible click will be heard when properly connected.
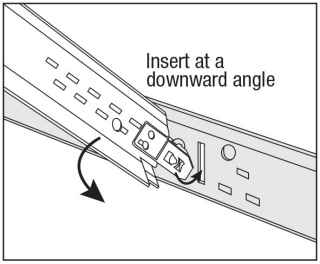
8. Install Panels – Slide the tile through the grid opening at an angle. Carefully lower into place. Cut any border tiles or required openings with a utility knife with the panel face up.
Install 24” x 24” panels in the same manner as 24” x 48” panels, with the following exceptions:
Preparations help the drop ceiling installation process go faster and more smoothly. Take your time and get ready to be surprised by how handy you are. Also, be sure to check out videos, more how-tos, and the full set of installation instructions below.
PDF Install a Drop Ceiling in 4 Steps
PDF Installation Instructions - Drop Ceilings
PDF Installation Instructions - Metallaire
PDF Installation Instructions - Easy Elegance Coffered Ceilings
Tell us your room dimensions and joist direction, and we'll tell you how to layout your 24"x 24" or 24" x 48" drop ceiling grid and provide an accurate materials estimate for your space.
Layout Grid and Estimate

Take your basement drop ceiling from drab to fab by swapping out those old 2' x 4' panels for fresh 2' x 2's. Grab some cross tees, choose your new tiles, and go!
Suspended ceilings perform well in a variety of spaces. Learn everything you need to know about mineral fiber suspended ceiling tiles.

For advanced DIY-ers, installing a drop ceiling has never been easier. Learn how!
Get the look of a coffered ceiling with plastic ceilings tiles. Easy to handle, clean, and install!
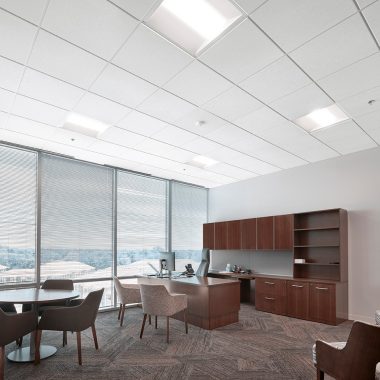
Light commercial ceiling tiles offer superior performance and fresh looks for your small business, office, kitchen, and other commercial spaces.
Decorative acoustic panels can create a beautiful space AND reduce noise by up to 70%. Learn how acoustical panels can add style and noise control to your home.

You just bought a house and inherited an old drop ceiling with it. Learn how to completely cover a drop ceiling in as little as a weekend!
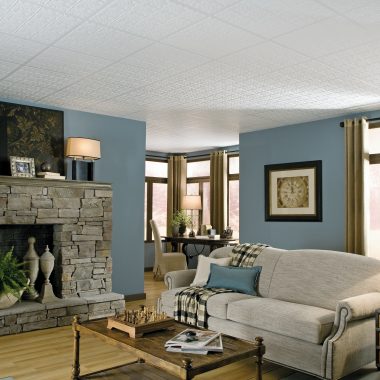
See all of the METALLAIRE ceilings, walls, backsplashes, and accessories that can add a shining twist to your space.
STYLESTIX ceiling grid covers snap onto an existing grid to add a coffered look without redoing the entire ceiling. Learn more.
Compare the different methods for installing ceiling tiles, whether it's surface mount or drop ceilings.

Are you remodeling and considering alternatives to drywall ceilings? This article will shed some light on stylish options for your custom taste.
Attach ceiling planks to an existing drop ceiling grid with special clips for a fresh wood look ceiling retrofit.

Repair or replace an old ceiling with ease. Many solutions are available for your needs and style.

What you need to know about designing with plastic (PVC) ceiling tiles in a coffered look.

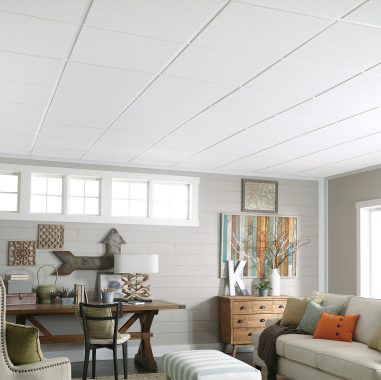
View all of the options for FINE FISSURED products. High-performing, textured drop ceilings for a variety of spaces.
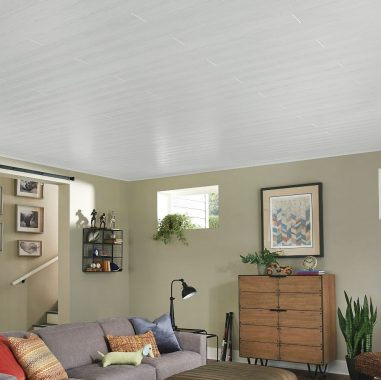
Drop down ceilings come in a wide variety of popular styles and performance features and are a quick way to give a tired room a facelift.

There are many factors to consider in estimating the cost of a drop ceiling project. Find what you need to know with this handy checklist.
Acoustic drop ceiling tiles from Armstrong Ceilings can reduce noise by up to 70%. Learn how a drop ceiling system is a great way to add value to your home.
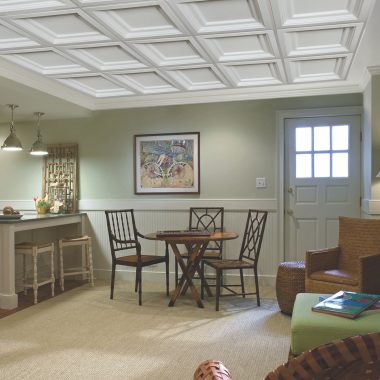
A coffered ceiling can bring drama or add subtle architectural detail to any room. Learn about your options, installation, design ideas, and more.

The full cost of a coffered ceiling is important to understand as you plan your ceiling project.

Create your ideal home with these drop ceiling ideas. Metal, coffers, and other decorative options are available.

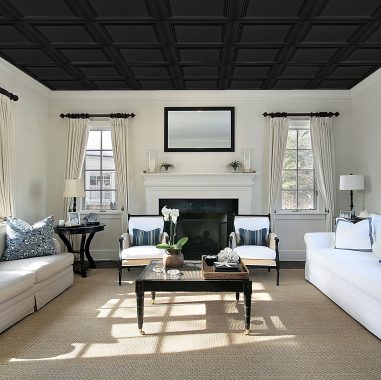
Add a dramatic look to any room with black ceiling tiles. Ideal for spaces where you want to pack a decorative punch.