Congratulations! You bought a house! You just spent the most money you’ll ever spend on anything, and basically signed away your life in one afternoon.
Gulp.
On top of all the paperwork (and the sinking feeling of dread - that’s the feeling of your youth slipping away), this house needs work. Like, it seriously needs work. And what’s one of the first thing that’s got to go?
Your ugly basement ceiling.

What if your dad’s brother’s cousin who sometimes works as a contractor doesn’t come through with his offer to help?
Don’t worry. We’ve got the ugly ceiling solution to cover a drop ceiling that will turn your new home from sad to rad in as little as one weekend. And the best part? You can do it yourself. And it can look like this:
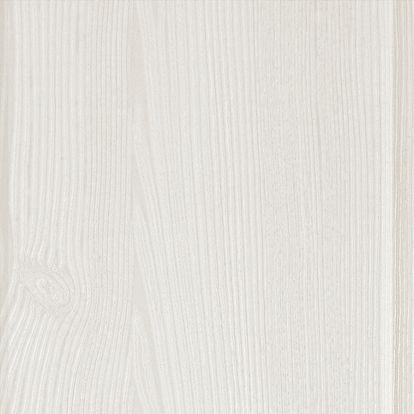
The part about unicorns is a little bit of an exaggeration, but these planks are pretty unique because they can install right over your existing ceiling grid.
That’s right. You can completely cover your ugly drop ceiling in a few simple steps.
For this to work, you’ve got to first make sure your grid is 15”/16” wide. That’s a pretty standard size grid, so you’re probably in good shape. You should order a special clip (we’ll get to that later) to test that your grid is the right size.
You’ll also need to know how many WOODHAVEN planks to order. Our material estimator is super easy to use, and will help you make sure you get the right amount. Once you have all the materials, you’re ready to rock and roll!
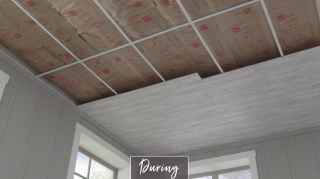
Have a party. Invite your friends. Have a few beverages (but not too many because owning a house and doing your own ceiling is serious adulting). Now, take all the ceiling panels out of the grid.
Order a sample of the EASY UP clips to make sure they fit securely to the 15”/16” grid. The planks must be supported every 24” with the clips, so you’ll have to plan that out. Then, simply attach the EASY UP Clips to the grid and you’ll be ready to fit in your WOODHAVEN Planks.
And, voila! You’re done! Ha ha, just kidding. This step is a little more involved. You have to decide which direction to install your planks, and you have to measure and cut the planks to fit in your space, all while staggering the seams so it looks natural. Finally, you’ll want to finish it off with trim. But, rest assured, installing the WoodHaven planks on your existing grid is fairly simple compared to a bigger DIY project of putting up grid yourself. Get more information on installing WOODHAVEN here.
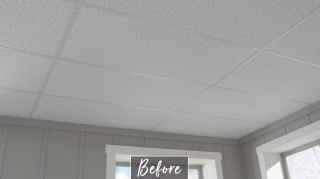
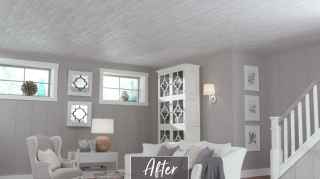
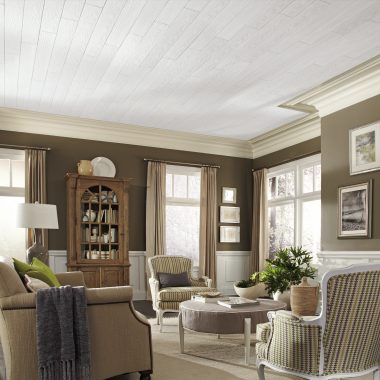
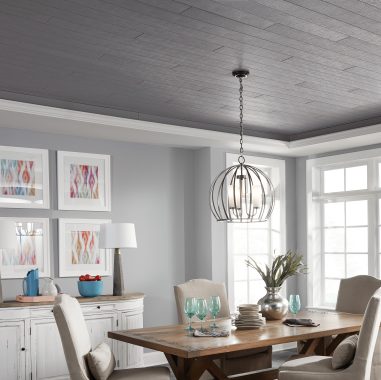
So, are you ready for a before and after that is going to blow your mind (again)?

Before

After
Find out more about a covering a drop ceiling here.

Selling your home can be a scary process. Read through to learn about the things that buyers are looking for and how to get the most for your home.
Wondering how to remove a popcorn ceiling? There is a better way! Cover it up instead - less mess and less time!
Learn about 5 simple and cost-effective ways to get your house ready to sell, including a simple kitchen backsplash!